
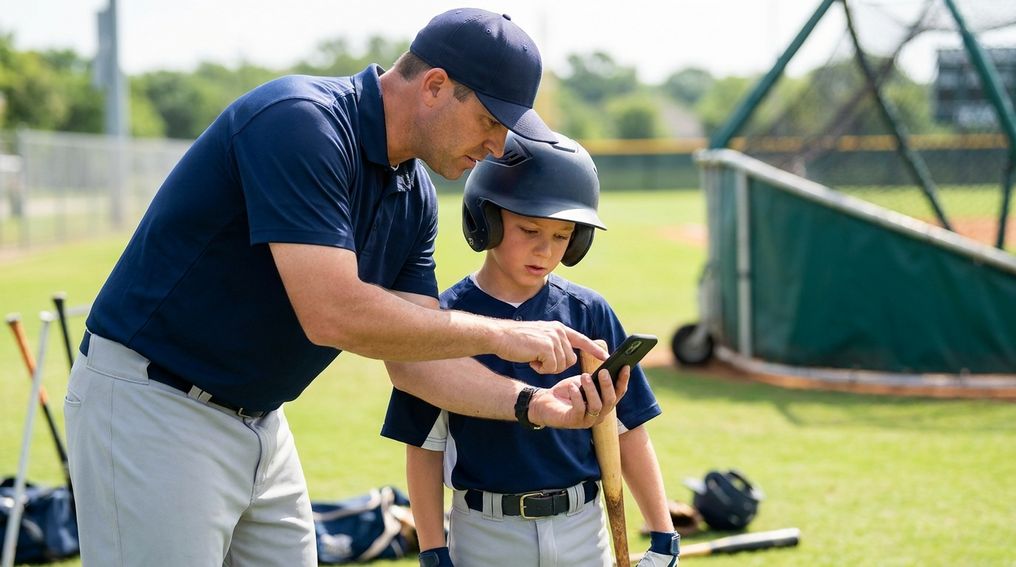
Video review for young hitters works best when you keep it short, simple, and focused on one visible change at a time. The goal isn’t to break the swing into a dozen parts; it’s to help the hitter see one pattern, connect it to one feel, and take that feel back into practice.
If you’ve ever filmed a swing and instantly noticed too many things to fix, you’re not alone. Young players don’t need a technical lecture; they need a repeatable process that makes the swing easier to understand. This guide shows you how to film better clips, review them without overloading the player, and turn what you see on screen into better work at the tee, in front toss, and during batting practice.
Why Video Review Works For Young Hitters Even Without Fancy Gear
Young hitters often think they’re doing one thing with their body when the video shows something different. That gap between feel and real is where video earns its value. A player may feel balanced but drift forward, feel quick but start late, or feel connected but lose the barrel early. A short clip gives you and the hitter a shared reference point instead of relying on memory or guesswork.
Research on youth baseball players has shown that video feedback can create immediate swing changes, including gains in bat speed during a single review session. Other sport skill research supports the same coaching lesson: video feedback works better when the learner is given a few clear items instead of a long checklist. That matters with young hitters because attention fades fast when every pause becomes another correction. Your job is to filter the video before the player has to process it.
You also don’t need a paid camera system to start. A smartphone with slow-motion recording is enough for most youth swing analysis. The bigger upgrade is your process, not your equipment. If the hitter can see the swing clearly, hear one simple cue, and repeat the movement right away, the review has done its job.
Set Up The Camera Like A Pro: Two Angles That Matter
The two most useful angles are side view and front view. Side view helps you see bat path, posture, stride direction, contact position, and whether the hitter is staying through the ball. Front view helps you see balance, timing, head movement, and how the body organizes from the start of the swing through contact. You don’t need six angles when two clean ones answer most coaching questions.
For the side view, set the camera around waist to chest height and place it perpendicular to the hitter. If the hitter is right-handed, film from the open side where you can see the chest, hands, and barrel clearly. Keep the entire body in the frame, including the feet, because footwork tells you a lot about timing and direction. If you cut off the feet, you lose one of the easiest clues young players can understand.
For the front view, film from behind the pitcher’s line or slightly offset for safety. Make sure the hitter’s head, hands, hips, knees, and feet are visible. Use the same distance and angle as often as possible so comparisons stay fair from session to session. Consistent camera placement makes video review young hitters can understand because the picture doesn’t change every time.
The 3-Checkpoint Method: Load, Stride, Contact
The simplest way to review a youth swing is to organize the clip around three checkpoints: load, stride, and contact. These checkpoints are easy to see, easy to name, and easy for a young hitter to connect to a movement feel. You’re not asking the player to understand every detail of bat path or sequencing. You’re giving the hitter three landmarks that make the swing less confusing.
At the load, look for readiness. The hitter should be balanced, athletic, and prepared to move on time. You don’t need to force every player into the same stance, but you do need to know whether the hands, body, and eyes look ready before the pitch arrives. If the load is late or rushed, many later swing problems are really timing problems in disguise.
At the stride, look for control. The hitter should move forward without lunging, collapsing, or losing the ability to rotate. At contact, look for a strong position where the head is steady, the body is balanced, and the barrel has a path through the hitting zone. These three checkpoints give you a clean hitting mechanics checklist without turning the review into a classroom lecture.
How To Review The Video With Your Player
Start by asking the player what they see before you give the answer. That one habit changes the tone of the whole session. Instead of the video becoming proof that the hitter did something wrong, it becomes a tool for discovery. Young players build better ownership when they learn to notice patterns themselves.
A good review can be as short as one clip, one question, and one action. Ask, “What do you notice about your balance when your front foot lands?” or “Where is the barrel when the ball is near the hitting zone?” Then listen. The player’s answer tells you whether they’re seeing the same thing you’re seeing, and it helps you choose a cue they can use.
After the player speaks, give one correction in plain language. Avoid stacking several ideas into one sentence. “Land soft and stay tall” is easier to use than a long breakdown of lower-body mechanics. If the hitter can repeat the cue before the next swing, you’ve kept the review at the right level.
Common Coach Mistakes That Create Confusion
The most common mistake is pausing too often. Slow-motion swing analysis can help, but constant stopping turns the clip into a technical interrogation. Let the player watch the swing once at normal speed, then once in slow motion. After that, choose the one frame or movement that matches your goal for the day.
Another mistake is using adult hitting language with a youth player. Terms that make sense in a coaching clinic may not help an eight-year-old or ten-year-old move better. Replace jargon with body-based cues the hitter can feel: “start earlier,” “stay balanced,” “finish through the ball,” or “land under control.” The cue should point the player toward the next swing, not just label the old one.
A third mistake is reviewing only the bad swing. Young hitters need to see what good looks like in their own body. If you have one clip where the hitter was balanced, on time, or strong at contact, show that clip too. Confidence grows when the player can connect success to something repeatable.
Making Video Review A Habit Without Killing The Fun
Video review should not take over practice. For players under twelve, short sessions are usually better because mental fatigue can show up quickly. A five-minute review is enough when the clip is clear and the goal is specific. The hitter should leave the screen wanting to swing, not wanting the meeting to end.
Use video review on a rhythm that fits your practice schedule. Once per week can work well for many young hitters, especially when the same checkpoint carries into tee work and front toss. You can film more often than you review, but don’t turn every swing into a public performance grade. Save clips that answer a specific coaching question.
Keep the tone neutral and useful. Say what the hitter did, what the video shows, and what the next rep should feel like. Praise effort and awareness when the player notices something accurate, even if the swing still needs work. That balance protects confidence and keeps the player engaged.
Screen To Tee: Turning What You See Into What You Do
A video session is incomplete until it leads to a practice task. If the player sees a late load, go straight to a tee drill with an early rhythm cue. If the stride is drifting, use a line on the ground to help the hitter land in a controlled direction. If contact looks weak or off-balance, slow the drill down until the hitter can hold the finish.
The best drill is the one that matches the checkpoint. Don’t choose a drill just because it looks advanced or popular. If the video shows a timing problem, a bat path drill may miss the real cause. If the video shows balance trouble, the hitter needs control before speed.
End the loop by filming one more swing after the drill. The goal is not perfection. The goal is for the hitter to see whether the feel created a better picture. That connection between screen, feel, and swing is where video feedback for hitters becomes useful instead of confusing.
How To Simplify Video Review For Young Baseball Hitters
- Film side view for bat path.
- Film front view for timing.
- Use load, stride, contact.
- Ask what the player sees.
- Keep review under 5 minutes.
Build A Review Routine Your Hitter Can Trust
Good video review young hitters can use is simple, short, and connected to the next swing. Film from the side and front, organize the clip around load, stride, and contact, then let the player speak before you correct. Keep the feedback small enough to act on and close the loop with a drill that matches what the video showed. When you use video this way, the player doesn’t feel picked apart; the player learns how to see, feel, adjust, and compete with more confidence.